How to Make a Fingerloop Lace
I need to make several laces for a project I'm working on - more on that soon - so I thought I would share how I make a basic fingerlooped lace. I've included a bit of history on fingerloop braids followed by a tutorial to help guide you in making your own.
Extant fingerloop braids can bee seen in artifacts from excavations from London as well as the on strings of reliquary purses.
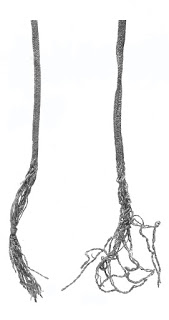
Fingerloop braids of 10 loops (left) and 14 loops (right), 13th and 14th centuries. Although these examples are more than 5 loops, several examples have been found from the excavations in London made of 5 loops, all dated to the 14th century. Museum of London: Textiles and Clothing, pg 139.

Reliquary purse with multi-colored fingerloop cord, Italy, 15th century. Royal Institute for Cultural Heritage #10069247, © KIK-IRPA, Brussels
I use a round lace made of 5 loops for the majority of my needs. I find that this style is easy to learn, easy to execute, versatile, and strong. I make my laces of silk and they withstand a great deal of pressure in my fitted dresses. The only lace I have broken - so far - was one I accidentally left in a dress and then ran it through the washing machine. The spin cycle was too much and it broke in half. :-(
The downside of using finger loops to make a lace is you need to complete the lace in one sitting. If you put the loops down, they get mixed up easily. I suppose you could create a rig to keep the loops from getting tangled, but I haven't found a good solution (if you have let me know!).
This style of lace is described in a 15th century braiding manual (Directions for making many sorts of laces -MS Harley 2320) as a 'Lace common round of 5 bows.' When originally researching this pattern, I found several places online that have the original wording and good translations including: Wire'n String, Silkwerk, and Fingerloop.org.
I have included the transcription of the pattern I use from Wire'n String in this post for comparison, but if you are interested in more information about medieval fingerloop patterns, I highly recommend the above sites.
For to make a round lace of v bowys: Do v bowys on þy fyngres as þu dedyst in þe brode lace. Þen schal A ryght take þorow B and C of þe same hond þe bowe C of þe lyfte hond reuersyd. Þen lowe þy lyfte bowys. Þen schal A lyft take þorow B and C of þe same hond þe bowe C of þe ryȝth hond reuerced. Þen lowe þy ryȝth bowys, & begyn aȝen.
I used trial and error to find my formula to determine the length of my loops. I double the measurement of my desired finished length and then add the measurement of my finished braid on again for waste and to allow for shrinkage from braiding. It works out to:
Finished length of lace = A
(A x 2) + A = length of thread for one loop
For this lace my calculations are (in inches):
Finished length of lace = 14
14 x 2 = 28 + 14 = 42 inches for one loop
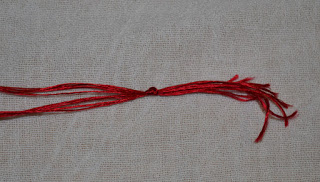
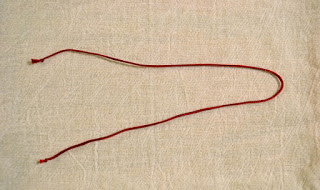
Cut 5 lengths of thread from using the above formula and form 5 loops. Line them up and tie a knot in one end:
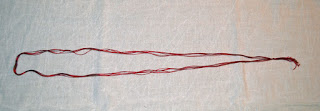
Then tie the loops around a dowel (like a table leg or chair). I use a piece of basic cotton cord to affix the loops to the table:

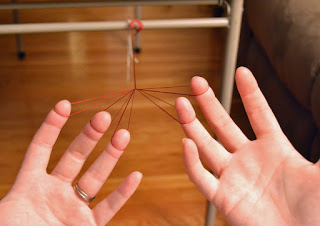
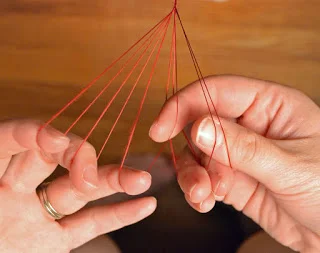
For this pattern, take one loop each on the 1st, 2nd, and 3rd fingers on your left hand and the 2nd and 3rd fingers on your right hand:
Sometimes untangling the loops is a but difficult, but if you can't get it perfect don't worry. I rarely get them all perfectly arranged, but once you get going the pattern will work out and you can retie the beginning when you are finished if needed to clean it up.
To work the pattern passing the 1st finger of your right hand through the loops on the other fingers of your right hand, grab the bottom half of the bottom loop on your left hand:
You now have 3 loops on your right hand and 2 on your left:
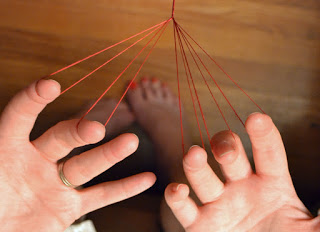
Move the loops on your left hand down so they are on the 2nd and 3rd fingers. This will be the mirror image of your original starting position. After each pass, I swing my hands outward to create tension in the braid. Repeat the above step with your left hand until you reach your desired length.
Remain watchful for mischievous helpers!

The finished product:
Once you have your lace, you can add metal aiglets to the ends. These make it easy to feed the lace through eyelets. I purchased these aiglets from Historic Enterprises and they have a small hole so you can sew the aiglets to the lace. Shhh, I have been known to use a drop of Krazy glue to keep the lace from pulling out!

This lace was a prototype for my current project. I decided it turned out too thin, so I either will use a thicker thread or try doubling up the loops.
